Get ready to whisk your taste buds into action with an easy Sweet Chili Chicken that promises a flavor explosion. This dish features tender chicken and vibrant veggies drenched in a sauce that’s both sweet and spicy—dinner done right! The combination of a luscious sweet chili glaze, savory soy sauce, sticky honey, and fresh ginger creates a taste symphony that’s as simple to achieve as it is impressive to serve. Perfect for beginners, this recipe comes together in a single skillet with about 25 minutes of prep and a 20-minute cooking time, making it a lifesaver on busy weeknights. I love how this recipe suits both a relaxed family dinner and an elegant casual get-together. It’s beginner-friendly yet delivers restaurant-quality flavors, clocking in at around 400 calories per serving. The vibrant reds of bell pepper, the gentle bite of onions, and the glossy sheen of the sweet chili sauce combine into a colorful plate that’ll jazz up your dinner rotation. When I first whisked up this glaze in my little countertop mixer, I was blown away by the delightful mingling of garlic and ginger—talk about kitchen magic!
Cooking this Sweet Chili Chicken feels like inviting a slice of restaurant flair right into your own home. I’ve spent countless weekends experimenting with different sauces and heat levels, but this balanced combo of sweet, spicy, and tangy always wins my heart. Each bite offers the tender chew of chicken thighs, the crisp crunch of red bell pepper, and the gentle sweetness of sautéed onions. Since there’s zero rest time, you glide straight from prep to sizzle, getting dinner on the table in under an hour. Whether you’re meal-prepping for work lunches, hosting a casual lunch with friends, or simply craving a fuss-free weeknight feast, this recipe adapts beautifully. The rice vinegar adds brightness, the honey gives a glossy sheen, and a final sprinkle of sesame seeds and cilantro elevates every mouthful. Trust me, once you taste that perfect balance of flavors, this Sweet Chili Chicken will earn a permanent spot in your recipe box.
KEY INGREDIENTS IN SWEET CHILI CHICKEN
To create this vibrant Sweet Chili Chicken, you’ll want to gather fresh, simple ingredients that each play an essential role in building layers of flavor. From the rich, juicy chicken thighs to the finishing garnish of cilantro, every component contributes texture, taste, and aroma.
- Boneless, skinless chicken thighs: These juicy pieces stay tender during cooking and soak up every bit of the sweet and spicy sauce.
- Sweet chili sauce: The heart of the dish—offering a perfect balance of sugar, chilies, and garlic that gives the recipe its signature glossy coating.
- Soy sauce: Brings depth and umami, enhancing the overall savory profile and countering the sweetness.
- Rice vinegar: Adds a subtle tang that brightens the sauce and prevents it from being overly sweet.
- Honey: Natural sweetener that helps thicken the sauce and deliver a gentle caramelized finish.
- Garlic: Minced garlic infuses every bite with its aromatic, savory punch.
- Ginger: Freshly grated ginger lends a warm, zesty kick and balances the sweetness.
- Vegetable oil: Neutral oil that ensures even cooking and a beautiful golden sear on the chicken.
- Red bell pepper: Provides color, crunch, and a mild sweetness that complements the glaze.
- Onion: Sliced onion softens as it sautés, releasing natural sugars for a rich, mellow backdrop.
- Salt and pepper: Simple seasonings that elevate all the ingredients and balance flavors.
- Sesame seeds and chopped fresh cilantro: Final garnishes that add nutty crunch and a burst of fresh herbal brightness.
HOW TO MAKE SWEET CHILI CHICKEN
Now that you’ve got your ingredients lined up, let’s dive into the cooking process. These steps will guide you through assembling the sauce, searing the chicken, and bringing it all together into a saucy, mouthwatering meal.
1. In a medium bowl, whisk together the sweet chili sauce, soy sauce, rice vinegar, honey, minced garlic, and grated ginger until the mixture is smooth and well combined. Set aside so the flavors can meld.
2. Season the bite-sized chicken pieces generously with salt and pepper, coating them evenly on all sides.
3. Heat the vegetable oil in a large skillet over medium-high heat. Add the chicken pieces and cook until each piece is beautifully browned and caramelized on all sides, about 5–7 minutes. Remove the chicken from the skillet and set aside on a plate.
4. In the same hot skillet, add the sliced red bell pepper and onion. Sauté for 3–4 minutes, stirring occasionally, until they begin to soften and pick up a bit of color.
5. Return the seared chicken to the skillet, then pour the prepared sweet chili sauce mixture over the chicken and vegetables.
6. Stir thoroughly to coat everything in the sauce, then reduce heat to medium and let it cook for another 5–7 minutes. The sauce will thicken slightly and cling to the chicken as it finishes cooking through.
7. Remove the skillet from heat and garnish with a sprinkle of toasted sesame seeds and a generous handful of chopped fresh cilantro.
8. Serve immediately alongside fluffy steamed rice or your favorite noodles for a complete, satisfying meal.
SERVING SUGGESTIONS FOR SWEET CHILI CHICKEN
Finding the perfect way to serve this Sweet Chili Chicken can be half the fun! Whether you’re plating for a cozy dinner or jazzing up a party spread, these ideas will help you showcase this colorful dish in style.
- Over fluffy jasmine or basmati rice: Spoon steaming hot chicken and veggies onto a bed of rice, allowing the grains to soak up every drop of the glossy sauce. Add a lime wedge on the side for a citrusy lift.
- Asian-inspired noodle bowl: Toss rice noodles or egg noodles with a drizzle of sesame oil, top with sweet chili chicken, and garnish with sliced green onions and extra cilantro for a noodle-forward feast.
- Crisp lettuce wraps: Fill crunchy lettuce leaves (like butter or romaine) with chicken and bell pepper for a light, hands-on appetizer or lunch option—perfect for warmer days.
- Family-style sharing platter: Arrange the chicken on a large serving dish alongside steamed broccoli, snap peas, or colorful shredded carrots for a communal meal that invites everyone to dig in.
HOW TO STORE SWEET CHILI CHICKEN
Leftovers of this Sweet Chili Chicken are almost as good as the first serving, making it an ideal make-ahead meal. Proper storage will keep your chicken juicy and your sauce perfectly glazed, ready for enjoyment later in the week.
Refrigeration: Transfer cooled chicken and vegetables to an airtight container and store in the fridge for up to 3–4 days. This helps lock in moisture and prevent the sauce from drying out.
Freezing: For longer-term storage, place portions in a freezer-safe bag or container, pressing out excess air before sealing. Label with the date and freeze for up to 2 months. Thaw overnight in the refrigerator before reheating.
Separate sauce (optional): If you anticipate leftovers, consider storing sauce separately in a small container. When you reheat, pour fresh sauce over the chicken to revive that just-cooked sheen and flavor.
Reheating tips: Gently reheat in a skillet over medium-low heat, adding a splash of water or broth if the sauce has thickened too much. Stir occasionally until heated through, then finish with a fresh sprinkle of cilantro.
CONCLUSION
Thank you for joining me on this delicious journey through Sweet Chili Chicken. We’ve explored how to blend sweet chili sauce, soy, honey, garlic, and ginger into a glossy glaze that coats tender chicken and crisp veggies in every bite. You learned about the key ingredients that make each component shine, from the rich umami of soy sauce to the bright pop of rice vinegar. We walked step by step through the cooking process—searing, sautéing, and simmering—until your kitchen fills with the irresistible colors and flavors of this crowd-pleasing dish. Serving suggestions, from rice bowls to lettuce wraps, offer endless creativity so you can tailor this meal to your mood or occasion. And with smart storage tips, leftover chicken transforms effortlessly into quick lunches or dinners later in the week.
Feel free to print this article and save it in your recipe binder for future reference—you’ll find a helpful FAQ section below to troubleshoot any questions you might have. If you give this Sweet Chili Chicken a try, I’d love to hear how it turns out! Drop a comment, share your favorite serving twist, or ask me any questions if you need help along the way. Your feedback makes my day, and I can’t wait to hear about your own kitchen adventures with this tasty, versatile recipe. Happy cooking!

Sweet Chili Chicken
Description
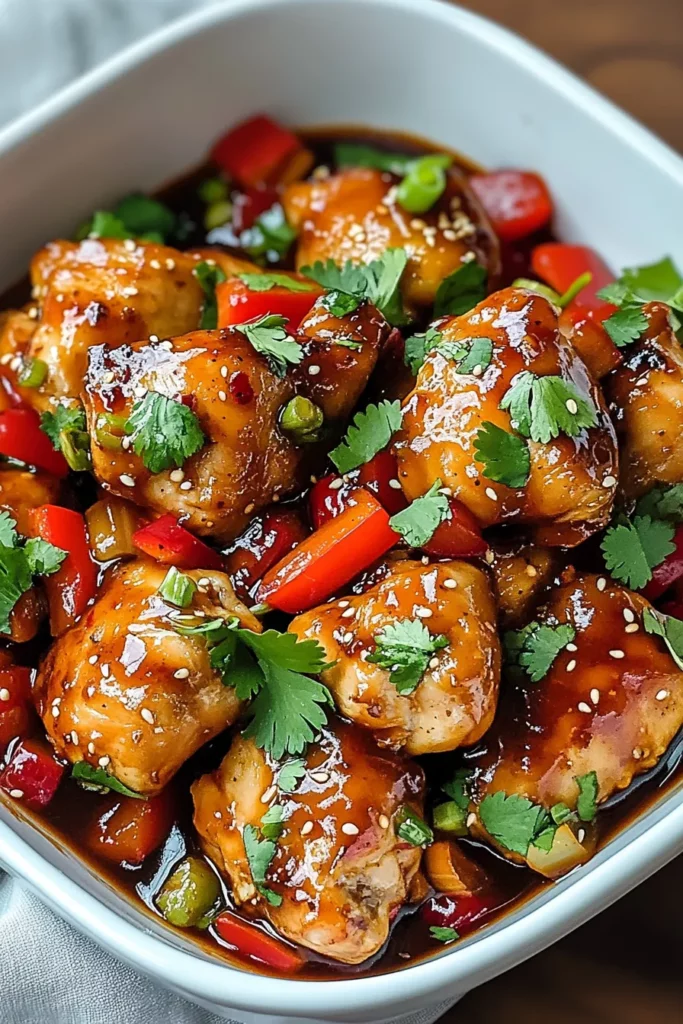
Juicy chicken and crisp veggies are coated in a luscious sweet chili glaze with hints of soy, honey, and ginger. A perfectly balanced, quick weeknight meal everyone adores.
Ingredients
Instructions
-
In a medium bowl, whisk together the sweet chili sauce, soy sauce, rice vinegar, honey, garlic, and ginger until well combined. Set aside.
-
Season the chicken pieces with salt and pepper.
-
Heat the vegetable oil in a large skillet over medium-high heat. Add the chicken pieces and cook until browned on all sides, about 5-7 minutes. Remove the chicken from the skillet and set aside.
-
In the same skillet, add the red bell pepper and onion. Sauté for about 3-4 minutes until they start to soften.
-
Return the chicken to the skillet, and pour the sweet chili sauce mixture over the chicken and vegetables.
-
Stir well to coat the chicken and vegetables in the sauce. Reduce heat to medium and cook for an additional 5-7 minutes until the sauce thickens slightly and the chicken is cooked through.
-
Remove from heat and garnish with sesame seeds and chopped cilantro.
-
Serve immediately with steamed rice or noodles.
Note
- Sweet chili sauce can vary in spiciness, adjust according to your taste preference.
- Chicken thighs can be substituted with chicken breast if preferred.
- Add other vegetables like broccoli or snap peas for more variety.
- This dish pairs well with jasmine or basmati rice.
- If you prefer a thicker sauce, mix 1 teaspoon of cornstarch with 1 tablespoon of water and add to the sauce during step 6.